 China eBike
E-Bike Torque Sensor Troubleshooting: What to Check When Pedal Assist Feels Inconsistent
A practical guide to diagnosing delayed, weak or uneven torque-sensor pedal assist before deciding whether professional e-bike service is needed.
When pedal assist becomes delayed, weak, uneven or intermittent, it is tempting to blame the electric bike torque sensor immediately. That is sometimes correct, but it is not a reliable diagnosis from symptoms alone. A similar loss of assistance can come from battery seating, a low battery state, an incorrect assist setting, a startup condition, wiring damage, a brake cutoff, a speed-sensor issue, controller behavior or a system fault.
The most useful approach is to treat inconsistent assist as a system-level problem. Start with checks that are safe and accessible to the rider, use the official manual and display messages for the installed drive system, and stop before disassembly or unsupported adjustments become necessary.
Start with the symptom — and make the bike safe to inspect
First, describe the fault as precisely as possible. The distinction can make later diagnosis faster:
- Delayed assist: power arrives only after several pedal strokes or after an unusual pause.
- Weak assist: the bike responds to pedaling but provides noticeably less support than expected.
- Surging or uneven assist: support rises and falls despite a relatively steady pedaling effort.
- Intermittent assist: power cuts in and out, often over bumps, during turns or after vibration.
- No pedal assist: the display is on but pedaling produces no motor support.
- Assist blocked by a warning or error code: the display shows a message, code or warning icon.
Before touching connectors or cables, switch the bike off. Remove the battery if the manufacturer instructs this for inspection or storage; otherwise, follow the model-specific manual. Do not inspect a powered system with the wheel or cranks likely to move unexpectedly.
Do not continue riding if you find crushed insulation, exposed conductors, melted plugs, significant corrosion, loose battery retention, or a connector that cannot be secured correctly. Those findings are not routine adjustment issues. They call for repair by a qualified technician or the brand’s authorized service route.
Aventon, for example, advises checking for obvious cable damage and loose connections when pedal assist is lost, including wiring associated with the display, main harness, motor, sensor and controller.1 The relevant locations and connector types vary widely, so use that kind of guidance only alongside your own bike’s manual.
What an electric bike torque sensor does — and what it does not prove
A torque sensor measures, directly or indirectly, the force a rider applies through the pedals. The drive system uses that input to determine how much motor support to provide under the selected assist mode.
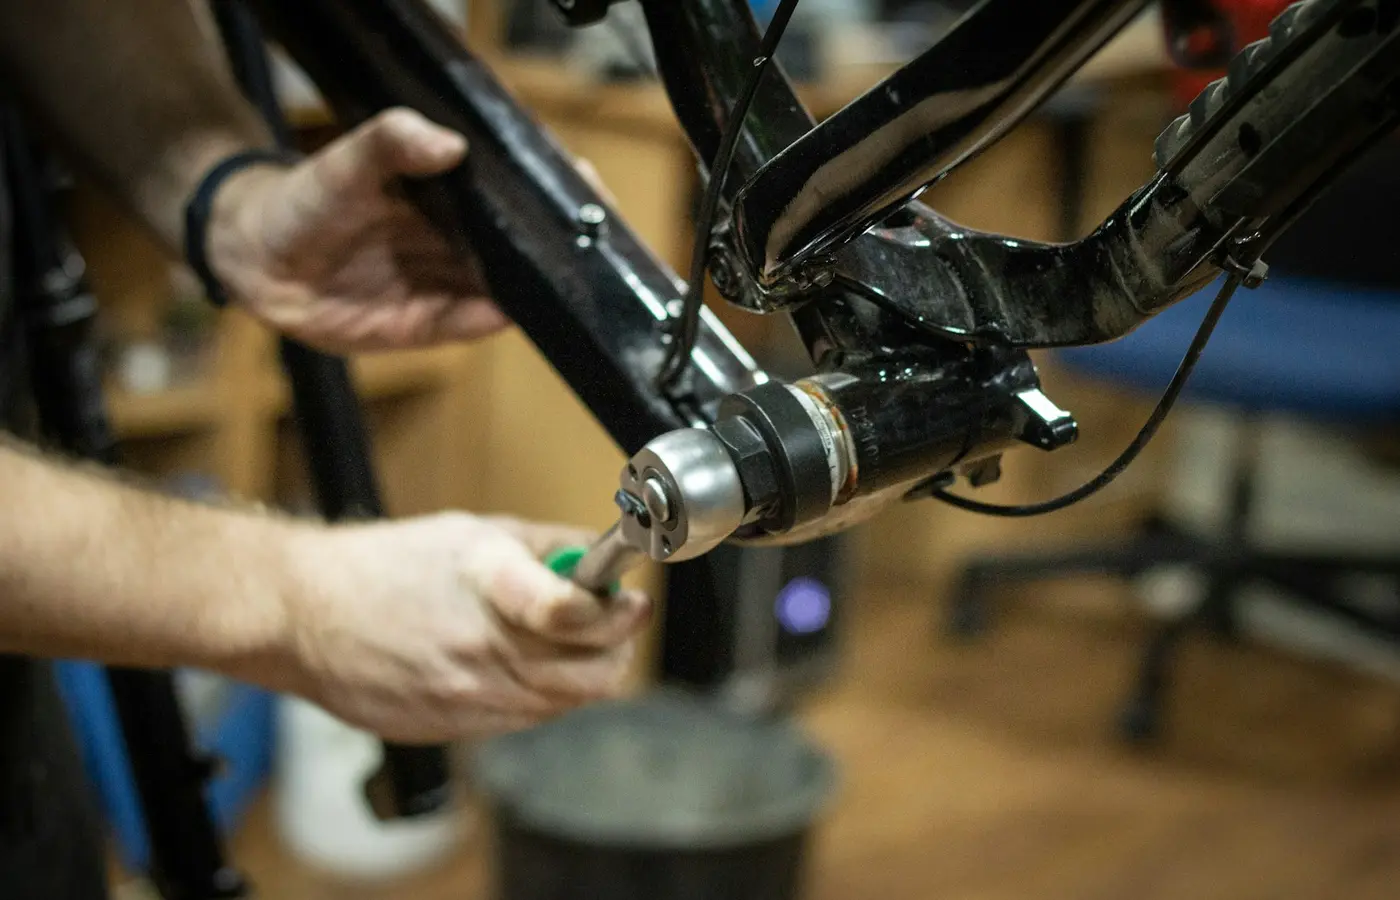
On many e-bikes, the sensor is located around the bottom-bracket area, crank assembly, rear dropout or another part of the drivetrain. The physical location, wiring route and service method depend on the system design.
A problem that feels like a torque-sensor fault is not proof that the sensor has failed. The motor can only assist when several systems are functioning and communicating correctly. Relevant possibilities include:
| Possible area | How it can resemble a torque-sensor problem |
|---|---|
| Battery and battery contacts | Low charge, poor seating or interrupted power can reduce or stop assistance. |
| Assist settings or display | A low assist mode, walk mode selection or display fault may change expected behavior. |
| Startup conditions | Some systems require the pedals to be unloaded at startup or issue a warning when they are not. |
| Wiring and connectors | A loose, damaged or corroded connection can interrupt sensor or controller signals. |
| Brake cutoff | A stuck or faulty brake-input signal can tell the controller not to power the motor. |
| Speed sensing | A missing speed signal can limit or prevent normal assistance on some systems. |
| Controller, firmware or internal components | These require system-specific diagnostics rather than guesswork. |
This is why replacing a sensor based only on weak or inconsistent assistance can be an expensive and ineffective first step.
Check startup conditions, battery state and assist settings first
Start with the lowest-risk checks. They do not require opening the motor, controller, bottom bracket or sealed harness.
1. Confirm that the battery is charged and fully seated
Check the battery’s charge indication using the method specified by the manufacturer. Then confirm that it is locked or latched correctly in its mount. A battery can appear installed while not being fully engaged at its electrical contacts.
If the battery was recently removed, inspect the accessible contact area for obvious dirt, moisture or damage. Do not use tools to scrape contacts, bend terminals or force the battery into place. If the battery does not lock normally, stop and seek service.
2. Check the display and assist selection
Turn the system on and note whether the display starts normally. Confirm the selected assist level, and check whether a warning symbol or error message is visible. A bike in an economy mode or its lowest assist level may feel unexpectedly weak without any component fault.
Also verify that the bike is not in a mode that changes normal pedal-assist behavior. Exact labels differ by brand and model, so the display section of the owner manual is more reliable than a generic online code list.
3. Restart using the manufacturer’s stated procedure
Switch the system off, wait briefly, then restart it according to the official instructions. Do not assume that every torque-sensor e-bike performs a user calibration at startup.
However, pedal loading during startup matters on some systems. Shimano STEPS documentation lists warning W013 as a torque-sensor activation failure and instructs the rider to restart without pressing on the pedals.2 That is a model-family-specific instruction, not a universal method for resetting or calibrating every e-bike.
If the bike begins working normally after a correct restart, continue to monitor it. If the issue returns, record the conditions rather than repeatedly restarting and assuming the underlying cause has been resolved.
Inspect accessible cables and connectors without disassembling the bike
With the system switched off, inspect only connectors and cable sections that are externally accessible and intended to be checked by an owner. Do not open sealed housings, remove the motor, pull apart a bottom-bracket assembly or cut cable ties to reach hidden wiring.
Look carefully at accessible sections near the display, frame entry points, battery mount, rear wheel or motor area, and any visible sensor connection. Check for:
- A plug that is partly separated or not seated squarely
- Cables pinched by a frame, rack, suspension movement or wheel hardware
- Cuts, flattening, abrasion or exposed wire insulation
- Dirt, water residue or corrosion around a connector
- Bent or damaged pins visible at a disconnected plug
- A cable that moves excessively or pulls tight when the handlebars are turned
Hyena’s troubleshooting guide identifies motor and sensor connections as initial checks when a powered system provides no assistance. It also advises checking for visible corrosion or bent pins on relevant connectors.3
If the bike manual permits an owner to disconnect and reconnect a specific plug, follow its alignment instructions exactly. Some connectors use arrows, keyed shapes or indexed positions. Never force a connector together, twist a plug that is not designed to twist, or probe terminals with metal objects.
For one example of why this matters, Trek’s guidance for its error code 17 identifies low torque-sensor output as potentially related to sensor or controller cable damage, disconnection, or bent sensor pins. Its instructions also specify aligning connector arrows before reconnecting.4 That code and procedure apply to the system covered by Trek’s documentation, not to every e-bike that displays a number 17.
Use error codes and repeatable symptoms to narrow the fault
An error code can be useful, but only when interpreted in the official documentation for the installed drive system. The same number can have a different meaning across brands, generations and displays.
Before contacting a dealer or support channel, make a short fault record. This gives a technician information that a general statement such as “the sensor feels bad” cannot provide.
Record the following:
- The exact error or warning code, including letters and symbols.
- The bike make, model, model year if known, and drive-system model.
- Battery indication at the time of the fault.
- Selected assist level and display mode.
- Whether the issue appears immediately after startup, only under load, after a bump, at a certain speed, or after riding for a period.
- Whether the motor is completely inactive, weak, delayed or surging.
- Whether the problem changes after a correct restart.
- Any visible cable, connector or battery-mount condition.
Avoid clearing a code repeatedly without noting it. A code that returns after a reboot is useful diagnostic evidence. A code that appears after a crash, transport damage, water exposure or wiring work is especially important to mention when requesting service.
When calibration, firmware or dealer diagnosis is appropriate
Calibration is not a generic cure for inconsistent pedal assist. A torque sensor may have a defined zero-point, initialization or calibration procedure, but the correct method depends on the drive system and sometimes requires dealer software or a specific service tool.
Use a calibration procedure only when it is published for your exact system by the manufacturer. Do not adjust hidden screws, alter undocumented display settings, or follow instructions intended for another motor family. Incorrect setup can create new faults or obscure the original one.
Firmware also needs a system-specific approach. Shimano STEPS documentation, for example, directs users facing certain listed system errors to update or restore drive-unit firmware through the E-TUBE PROJECT application.2 That instruction does not establish that a firmware update is appropriate for every weak-assist symptom or every e-bike brand.
Professional diagnosis is the sensible next step when any of the following apply:
- An official error code persists after the prescribed restart.
- A connector, cable or pin is visibly damaged, corroded or loose.
- Pedal assist cuts out repeatedly despite a charged, correctly seated battery.
- The issue follows a crash, severe impact, water intrusion or unauthorized wiring work.
- The suspected component is inside the motor, bottom-bracket assembly, controller or sealed harness.
- The manual specifies dealer-only calibration, software access or component replacement.
- The bike is still within its warranty period and the maker requires authorized service.
A qualified technician can check fault histories, sensor input values, controller communication and component continuity using equipment that is not available through normal rider controls. That is more informative—and generally safer—than replacing parts by trial and error.
A practical troubleshooting order before booking service
Use this sequence to separate simple, rider-accessible checks from faults that need diagnosis:
- Identify the symptom. Is assistance delayed, weak, surging, intermittent or absent?
- Check the basics. Confirm battery charge, battery seating, normal display operation and the selected assist level.
- Restart correctly. Follow the exact startup instructions for the drive system, including unloaded pedals where the manufacturer requires it.
- Read the display. Photograph or write down any warning or error code before attempting repeated restarts.
- Inspect accessible wiring. With power off, look for loose plugs, dirt, moisture, damaged insulation, corrosion or bent pins. Reconnect only where the manufacturer permits it.
- Test once under normal conditions. If no damage or warning remains, use a short, controlled ride in a safe area and note whether the symptom repeats.
- Seek service for persistent or unsafe faults. Stop using the bike when damage is present, codes recur, or assistance remains unpredictable.
The practical conclusion is simple: inconsistent pedal assist is a reason to inspect the whole e-bike system, not a reason to diagnose the torque sensor by feel alone. Battery and settings checks, a correct restart, an external cable inspection and accurate error-code records can rule out obvious issues. Persistent faults, internal components and any electrical damage belong with the manufacturer, dealer or a qualified e-bike service provider.
Frequently asked questions
Why does my e-bike torque sensor feel weak after I turn the bike on?
A weak response after startup may relate to assist settings, battery state, startup conditions, wiring, a brake-input issue, speed sensing, controller behavior or the torque sensor itself. Check the battery, display and selected assist mode first. If your system manual requires the pedals to be unloaded during startup, restart the bike using that procedure. Do not assume the sensor has failed from weak assist alone.
Can a loose torque sensor cable cause pedal assist to cut in and out?
It can, depending on the system design and the affected connection. An interrupted sensor or controller connection may produce inconsistent assistance or a fault code. With the bike switched off, inspect externally accessible connectors for incomplete engagement, damage, corrosion or bent pins. Do not force plugs or disassemble sealed components.
Should I calibrate an e-bike torque sensor myself?
Only if the manufacturer publishes a rider-level calibration process for your exact drive system. Startup without pedal pressure is required for some systems, but it is not a universal calibration method. Dealer software, service tools or a specified procedure may be required.
What should I do if my e-bike shows a torque sensor error code?
Record the exact code, consult the official documentation for the installed system and follow only its stated restart or inspection steps. If the code returns, if wiring is damaged, or if the manual directs service, stop troubleshooting beyond permitted owner checks and contact a qualified dealer or the manufacturer.