 China eBike
E-Bike Display and Controller Compatibility: Protocols, Connectors, and Replacement Checks
Learn how e-bike display compatibility depends on protocols, pinouts, voltage, firmware, and approved replacement parts—not just connectors.
Replacing a damaged e-bike display can look straightforward: find a screen with the same connector, mount it on the handlebar, and plug it in. In practice, that approach can produce a blank display, missing functions, incorrect readings, or no communication with the controller.
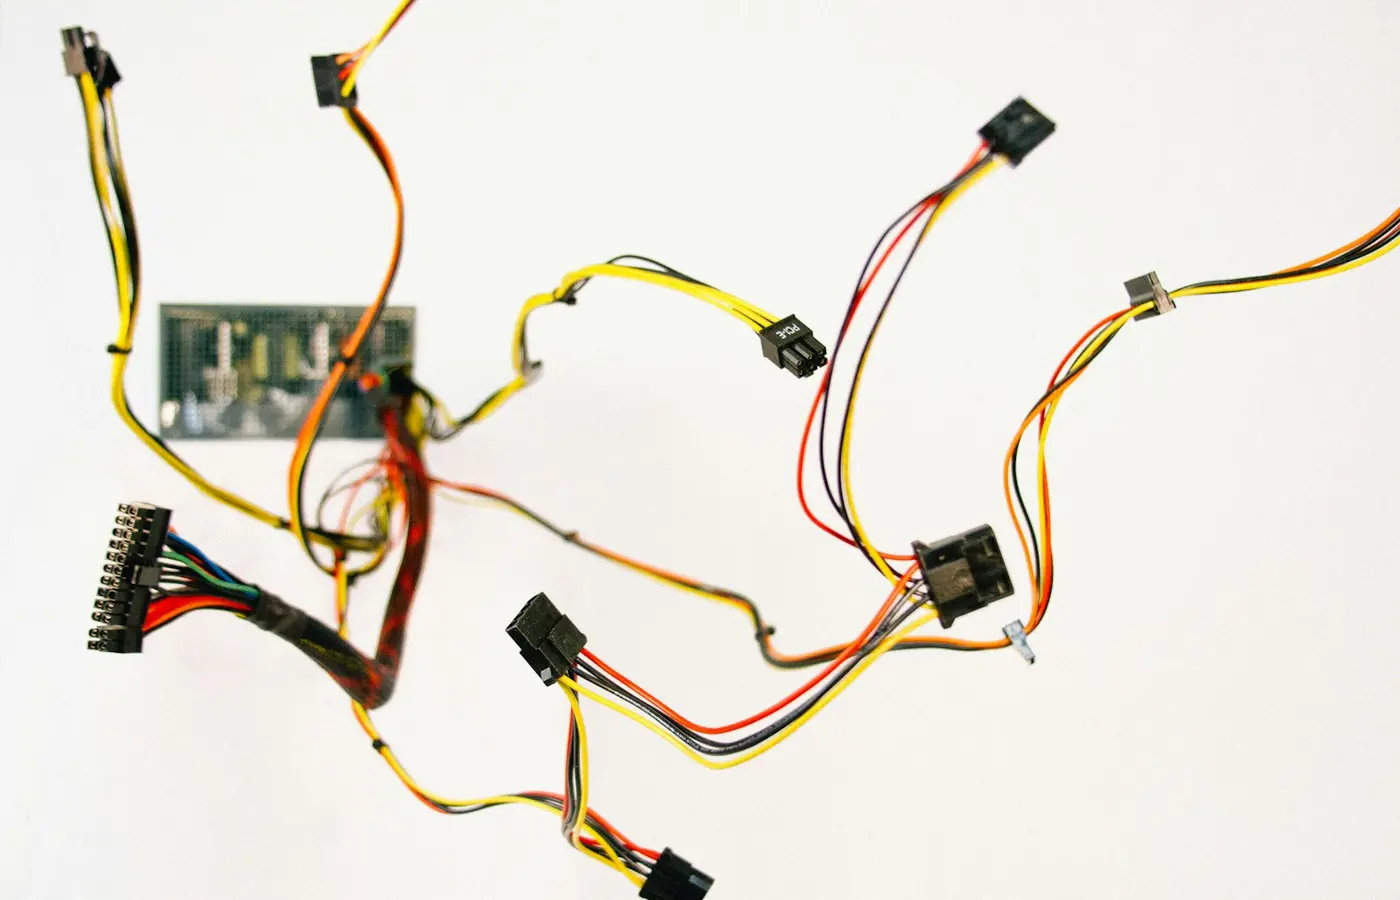
For reliable e-bike display compatibility, the replacement must match more than the plug. It may need to match the controller’s communication protocol, connector pin assignment, display supply voltage, control functions, and firmware expectations. On some systems, it must also be an approved spare part that can be paired or configured with service software.
The safest buying decision is usually an exact replacement identified by the original display or controller part number. If that part is unavailable, treat the replacement as a system-matching task rather than a screen upgrade.
Why a matching connector does not prove compatibility
A connector answers only one question: can two components physically connect? It does not confirm that they are electrically or digitally compatible.
Round waterproof connectors are common on e-bikes, including five-pin versions used on many display harnesses. However, two connectors with the same shape, colour, and pin count can still differ in important ways:
- Pin assignment: power, ground, data, ignition, and accessory connections may use different pins.
- Electrical levels: components may expect different supply or signal voltages.
- Communication method: one display may use a serial link while another uses a network-based system.
- Data format: even two products described as UART or CAN bus may use different commands and message definitions.
- Firmware requirements: the controller may accept only particular display firmware versions or approved component identifiers.
- Functional wiring: lights, walk assist, brake-related controls, remotes, and button pads may be handled differently.
A supplier guide on display wiring makes the key point clearly: a physically similar connector does not establish a common pinout or compatible software communication.1 This is especially relevant for replacement listings that identify compatibility only by connector type.
Connector colour and wire colour are useful clues when comparing an existing harness with documentation. They are not proof. Manufacturers and component suppliers can use different colours for the same function, or the same colours for different functions.
Before ordering, record the full bicycle model, controller label, existing display label, connector markings, and any visible firmware or hardware revision. These identifiers are normally more useful than a photograph of the display face.
The display-controller link: UART, CAN bus, and supplier-specific systems
The display is the rider-facing interface, but it is also a communications device. It can request assist-level changes, show battery information, receive speed and fault data, control lights, and pass commands from buttons or a separate remote.
Two communication approaches are frequently encountered in e-bike systems: UART and CAN bus.
UART: a direct serial connection
UART stands for Universal Asynchronous Receiver-Transmitter. In an e-bike context, it commonly describes a direct serial data link between the display and controller.
A UART-equipped display and controller may use dedicated transmit and receive data lines alongside power and ground. Some systems using this arrangement have five-pin display connectors, but five pins alone do not prove that the system is UART.2
UART is a method of carrying serial data; it does not guarantee a universal e-bike command language. A display and controller may both use UART while still failing to communicate because their command sets, startup behaviour, settings structure, or firmware versions differ.
CAN bus: a shared network
CAN bus, short for Controller Area Network, is a network communication method. Rather than a simple point-to-point display link, a CAN-based e-bike system may allow several devices to communicate on shared network wires. Depending on the design, those devices can include the controller, display, battery-management system, sensors, lights, or other modules.
This architecture can support more coordinated system diagnostics and component communication. It does not, however, mean that any CAN display will work with any CAN controller. The messages exchanged on a CAN network are defined by the system designer, and those definitions can be supplier- or model-specific.
Protocol names are only the first check
It is tempting to reduce the decision to “UART versus CAN.” That is necessary information, but it is not sufficient information.
A compatible replacement must usually match all of the following:
- The physical connector and keying.
- The verified pin assignment.
- Power supply requirements.
- The communication protocol.
- The supplier’s message format and firmware expectations.
- The system functions required by the bike.
- Any activation, configuration, or pairing procedure.
Some system documentation refers to a display as an HMI, or human-machine interface. Whether it is called a display, dashboard, console, LCD, TFT, or HMI, the compatibility questions remain the same.
What to match before ordering
The most useful comparison is not display size or appearance. It is a component-level comparison between the installed system and the proposed replacement.
| What to verify | Why it matters | What counts as useful evidence |
|---|---|---|
| Display part number | Identifies the intended hardware revision and replacement family | Label, parts catalogue, original order record, service manual |
| Controller part number | Helps determine the supported display range | Controller label, wiring diagram, system documentation |
| Protocol | Determines how controller and display exchange data | Supplier documentation explicitly naming the protocol |
| Connector family and keying | Prevents mechanical mismatch or forced connection | Clear photos of both connector halves and connector markings |
| Pin assignment | Prevents power or communication lines being connected incorrectly | Exact wiring diagram or verified supplier pinout |
| Supply requirements | A display may not tolerate or operate on another system’s supply arrangement | Display and controller datasheets or labels |
| Firmware or hardware revision | May affect communication and supported functions | Version screen, label, diagnostic documentation |
| Required functions | Ensures controls and indicators work after replacement | Bike manual and display function list |
Voltage and display power requirements
A display is not necessarily powered directly by the nominal battery voltage. The controller or wiring harness may provide a regulated supply for the display, and the expected voltage depends on the specific system design.
Do not assume that a bike described as 36 V or 48 V uses that same voltage at the display connector. Likewise, a display advertised for a particular nominal battery voltage may still be unsuitable if its communication or pin assignment differs.
Check the display specification, the controller documentation, or an exact wiring diagram. If documentation does not identify the display supply arrangement, do not infer it from the bike’s battery label.
Pinout and wire count
Pin count is a starting point, not a conclusion. A five-pin harness may allocate pins to power, ground, serial data lines, an ignition or wake line, or another function. Other systems may use a different combination.
Compare:
- Number of contacts and their physical arrangement.
- Connector keyway, alignment mark, and locking method.
- Male and female sides of the connection.
- Pin numbering, if marked.
- Wire count entering each connector.
- Verified function of each pin.
Never repin a connector based solely on wire colours or an online image. An unverified pinout can damage components or create a short circuit.
Buttons, remotes, and required functions
A display may have integrated buttons, while another system uses a separate left-hand remote. A replacement can fit and communicate partially yet still omit a needed control pathway.
Before purchase, list the functions the bike requires:
- Power on/off or wake command.
- Assist-level selection.
- Walk assist.
- Light control.
- Trip and settings controls.
- Battery and range display.
- Error-code display.
- Speed and distance configuration.
- Compatibility with a separate button pad or remote.
The replacement should support these functions in the way the controller expects. A screen that merely turns on is not necessarily a complete replacement.
Firmware, pairing, and approved component configurations
Firmware is the embedded software that governs how a display starts, communicates, shows information, and sends commands. It is one reason an electrically plausible replacement can still fail.
Possible outcomes of a display-controller mismatch include:
- The display remains off.
- The display powers on but shows no live system data.
- Assist settings do not change motor behaviour.
- Battery, speed, or distance values are missing or implausible.
- Certain functions, such as lights or walk assist, do not operate.
- The system reports a communication-related fault.
These symptoms do not identify one universal cause. For example, an error number should be interpreted only through the documentation for the exact e-bike system. Generic error-code charts found online may use different definitions.
Some manufacturers document replacement displays as parts that require activation, pairing, configuration, or firmware updates through an authorized service process. Others offer a defined set of compatible displays for a controller family. Where this information exists, it should take priority over broad marketplace claims such as “works with all 36 V controllers.”
A general replacement guide similarly recommends checking the original manual or supplier-approved replacement list before comparing electrical and communication details.2 That is sensible because official compatibility matrices can account for software and revision differences that are not visible from the outside of a connector.
Avoid making assumptions about whether a particular brand, controller, or bus type is open or locked. Policies and technical requirements can vary by model generation, market, firmware revision, and component family.
Replacement checklist: identify the system before you buy
Use this sequence before ordering a replacement display.
1. Identify the bicycle and drive system
Record the bike brand, model, model year if known, and any system name used in the owner documentation. If the bicycle was assembled from separate components, identify the controller and motor system independently.
2. Photograph and transcribe every relevant label
Take clear photographs of:
- The old display label and rear housing.
- The controller label.
- Both sides of the display connector.
- Any separate handlebar remote or button pad.
- Wiring labels or connector markings.
Write down full part numbers, not only the most prominent brand name. Suffixes and revision codes can matter.
3. Check official replacement information first
Look for the bicycle maker’s parts catalogue, owner manual, service documentation, or support channel. Then check documentation from the controller or drive-system supplier if it is separately identified.
The strongest evidence is an approved replacement part number or a compatibility statement that names both the exact controller and display versions.
4. Confirm the communication method
Use documentation to determine whether the display-controller link is UART, CAN bus, or another supplier-specific interface. Do not identify the protocol solely from connector colour, shape, or pin count.
5. Verify connector family and pin assignment
Confirm that the connector is mechanically correct and that the pinout is documented for both components. A plug that fits but uses different power or data pins is not compatible.
6. Verify display power requirements
Check the documented display supply requirements against the controller output or harness specification. Nominal battery voltage is not enough evidence on its own.
7. Compare required functions
Confirm the replacement supports the existing bike’s controls, including any separate remote, lighting command, walk mode, settings access, and diagnostic display.
8. Check programming or pairing requirements
Determine whether the display needs dealer activation, diagnostic software, a firmware update, or a component registration process. If the procedure is not publicly documented, ask the manufacturer or an authorized service provider before buying.
9. Choose the lowest-risk option
When evidence is incomplete, choose one of these options:
- An exact OEM part number.
- A manufacturer-documented superseding part.
- A documented compatible display-and-controller kit.
- Professional diagnosis before purchase.
A complete, documented controller-and-display kit can be more predictable than trying to combine unrelated components. It may still require careful verification of battery, motor, sensor, light, and legal configuration compatibility.
When to stop and seek qualified support
DIY replacement is most suitable when the replacement is explicitly approved and the installation procedure is clear. Pause and seek manufacturer or qualified service support when any of the following applies:
- No reliable wiring diagram or approved replacement list is available.
- The connector has been cut, spliced, adapted, or visibly modified.
- Wire colours or connector arrangement differ from available documentation.
- The replacement requires dealer software, pairing, or firmware installation.
- The display powers on but persistent communication faults remain.
- The bike has an integrated battery-management or networked drive system with unclear component requirements.
- You are considering repinning connectors or modifying firmware without verified service information.
Improvised rewiring is particularly risky because it can place power on a data line or connect incompatible electrical levels. A connector adapter changes physical fit; it does not establish correct pin assignment, protocol, or firmware support.
Frequently asked questions
Can I use any e-bike display with the same five-pin connector?
No. A five-pin connector may be used by different systems with different pin assignments, supply requirements, and communication methods. Confirm the exact display and controller compatibility through part numbers, wiring documentation, and supplier guidance before connecting a replacement.
How can I tell whether my e-bike display uses UART or CAN bus?
The dependable method is to check the controller, display, or system documentation. Labels may sometimes identify the interface, but connector appearance is not conclusive. A five-pin round connector can appear in UART-based systems, yet it should not be treated as proof of UART.1
Will a replacement display work if the voltage matches?
Not necessarily. Matching voltage does not confirm a matching pinout, connector keying, communication protocol, command set, firmware, or required functions. Voltage is one check within a larger compatibility assessment.
Do I need to pair or program a new e-bike display?
Possibly. Some systems accept an approved replacement directly, while others may require configuration, pairing, activation, or firmware work. Check the exact bike or drive-system service documentation before purchase rather than assuming either outcome.
Practical takeaway
Treat the display and controller as a matched electronic system, not as separate accessories. Before buying, verify the exact part numbers, approved replacement status, protocol, connector keying, pinout, supply requirements, required functions, and any pairing procedure.
If any of those points cannot be confirmed, an exact OEM replacement or documented compatible kit is the lower-risk choice. A matching plug is useful evidence of physical fit—but it is not evidence of full e-bike display compatibility.